Working with Photoshop Elements 11.
Photoshop Elements is a hugely powerful tool for the price and one of the nice features of the lastest version, Photoshop Elements 11 making many image editing tasks very easy by introducing the ‘guided’ mode. The ‘expert’ mode provides the greatest number of features and options, and most closely resembles the full professional version of Photoshop. One of the most useful features only available in ‘expert’ mode is the layers feature (note, the layers menu is still visible in the top menu bar in both ‘quick’ and ‘guided’ modes, but all options in the drop-down menu are greyed out).
In this blog I’m going to talk about using the Horizontal Type Tool (symbol ‘T’) to create text layer on your image, and then how to modify the text appearance, making it semi-transparent, by changing the layer opacity.
Step 1. Once you have opened up Photoshop Elements, select Photo Editor mode, then ensure you are in ‘expert’ mode. Once this has loaded then open the image you wish to add text to. As my example I have chosen an image of a black swan guarding her nest as the River Exe floods. I am going to add copyright text to this image, something I often do to identify my images prior to placing them online.
Step 2. Once your image has loaded, click on the Horizontal Type Tool ‘T’ (highlighted in grey on the lower LHS of the image below).

Image 1. Adding text to an image in Photoshop elements 11, step one, select the Horizontal Type Tool (T).
You’ll notice that a sub-menu pops up beneath the image. Heer you will find options to change the default font, font size, font style, colour, leading and anti-aliasing. Leading (pronounced ‘ledding’) refers to the spacing between lines in a paragraph, should you be writing more than one line of text. Anti-aliasing (very briefly) smooths jagged edges that can occur around the edges of text; if you’re not familiar with anti-aliasing leave the box checked.

Image 2. Sub-menu where text font and styles can be edited.
Step 3.
Once you have select the style of text you want, move your mouseso the cursor is over the area of the image where you want your text to appear and left click. You’ll notice that a new layer suddenly appears in the layer palette on the RHS of the image (see image below). This is the text layer, by default named layer 1. You can change this simply by going to the layer drop down menu and selecting rename layer. This is useful if you are creating multiple layers and prefer to name them intuitively.
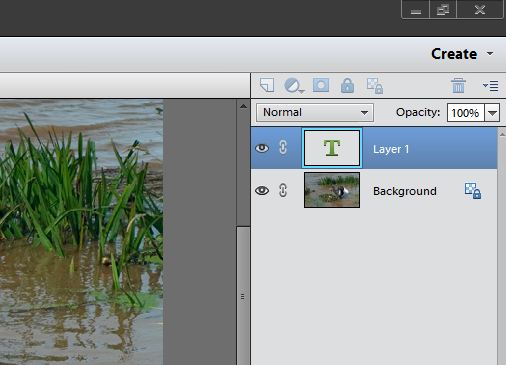
Image 3. Text appears as a new layer
The next step is simply to type your text. I’ve chosen to add copyright text to my image, something I tend to do before uploading any images.

Image 4. Adding copyright text to an image
Sometimes text can look very intrusive in an image. One way of reducing this is to change the opacity of your text. We do this by going back across to our layers menu and clicking on the arrow at the side of the opacity box, immediately above our layers. This then displays a slider control whereby we can vary the opacity of the active layer (i.e. the one highlighted in blue) in this case out text layer, from between 1-100%. As you can see in this example I’ve selected 41% opacity. As an aside, you’ll also note that Elements has changed the name of the layer to the text I’ve typed. This can also be helpful in allowing us to remeber which layer is which.

Image 5. Changing the opacity of your text
xxxxxxx

Image 6. Text with reduced opacity
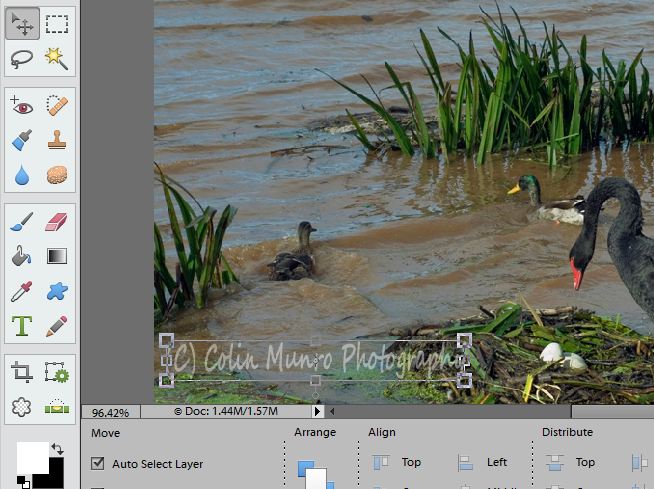
Okay, so we’ve got our text written, we’ve reduced the opacity to our liking, only now it’s there we suddenly realise it’s in the wrong part of the image. Not a problem. We simply select our ‘Move’ tool. You should then see a bounding box appear around our text, as in image 7, below.

Image 7. Selecting text with the ‘Move’ tool
Moving our mouse over the text, hold down the left button and drag the text to the part of the image where you would like it to be.
- Image 8. Our text has now been moved.
Our final steps and to flatten our image, reducing our two layers back to one, and then save our image. To flatten our image we open up the Layer drop down menu in the top menu bar and select ‘flatten image’ which should be the option right at the very bottom of the drop down menu. Once we click on this you should see that our two layers become one, as in image 9 below. We can then either save our image or rename it through the ‘save as’ option.
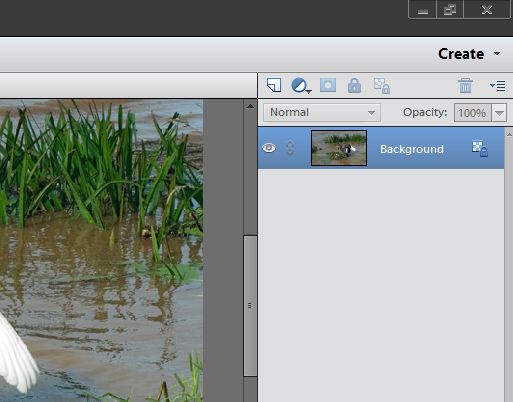
Image 9. Our final step is to flatten our image.