
ISO in Photography. How it works

ISO settings in menu of a DSLR

What is ISO in Photography?

What exactly is ISO? How does the ISO control on your camera work? How does changing ISO affect your photography? When learning the basics of photography, we learn about focus and we learn about exposure; and we also learn that exposure is controlled, at its most basic level, by three variables: shutter speed, aperture size and ISO. We also learn of the relationship between the three variables, the concepts of STOPS, and how to change the exposure by changing any one of these variables. Now shutter speed and aperture size are fairly intuitive concepts to grasp. If we slow down the shutter speed from 1/100th of a second to 1/50th of a second, so that the image sensor is exposed to light for twice as long, then we can understand how this will double the amount of light hitting the sensor, increasing the exposure by ONE STOP. Similarly, if we open up the aperture from f16 to f8, again doubling the amount of light hitting the sensor, this again will increase the exposure by one stop. (I know, it’s a little counter-intuitive that the higher f value is the smaller aperture). But ISO? What physically is changing? How does changing ISO change exposure? Is the amount of light hitting the sensor changing somehow? (Spoiler, no it’s not).

ISO settings within the menu of a DSLR (Nikon D610)

What does ISO mean?

Okay, so what exactly is ISO? ISO is the acronym for the International Organisation for Standardisation (ISO was decided on as the initials would be different depending on the language used). The ISO still exists (with its own website) it sets standards for everything from aircraft components to surgical instruments to building construction. But that doesn’t really tell us anything about what it is, or does, in relation to cameras. The name dates back to film cameras, and was originally called ASA, an acronym for American Standards Association, if the film was from the USA (e.g. Kodak film) or DIN, the Deutsches Institut fur Normung, if the film was from Germany (e.g. Agfa film). These were simply national standards associations that standardised a great many things, from computer programming languages to thread sizes on machine bolts. DIN and ASA film speed standards became shortened to DIN and ASA on the labels on camera film. There was also a Soviet standards system known as GOST (Gosudarstvennyy Standart) which was also used for film in Soviet and some asian countries. When these standards were amalgamated into the ISO system so the film speed standards were changed to ISO. For example ASA 100, and DIN 21, became ISO 100/21; ASA 200 and DIN 24 became ISO 200/24 (often the logarithmic DIN part was omitted e.g. the 21 or 24 in these examples). Similarly GOST 90 became ISO 100, GOST 180 became ISO 200. So that explains where the name came from, but not what ISO actually is.

Film carton Fuji Provia 100
Fuji Provia 100 Film box. The 100 indicates this is 100 ISO film

ISO speed in Film

As explained above, the term ISO (or ISO speed) originated in camera film, so lets start there. Unlike shutter speed and aperture size, ISO works rather differently in film and in digital photography. Those of you old enough to have used film cameras may remember we used to talk about ‘fast film’ and ‘slow film’. This referred to how much light was required to correctly expose the film. Fast film required relatively little light (and so could be exposed at faster shutter speeds, all other things being equal) while slow film required more light.

Fuji Provia ISO 100/21
Fuji Provia ISO 100/21. The 100 indicates the arithmetic scale (same as ASA) the 21 indicates the logarithmic scale (the same as the older DIN system)

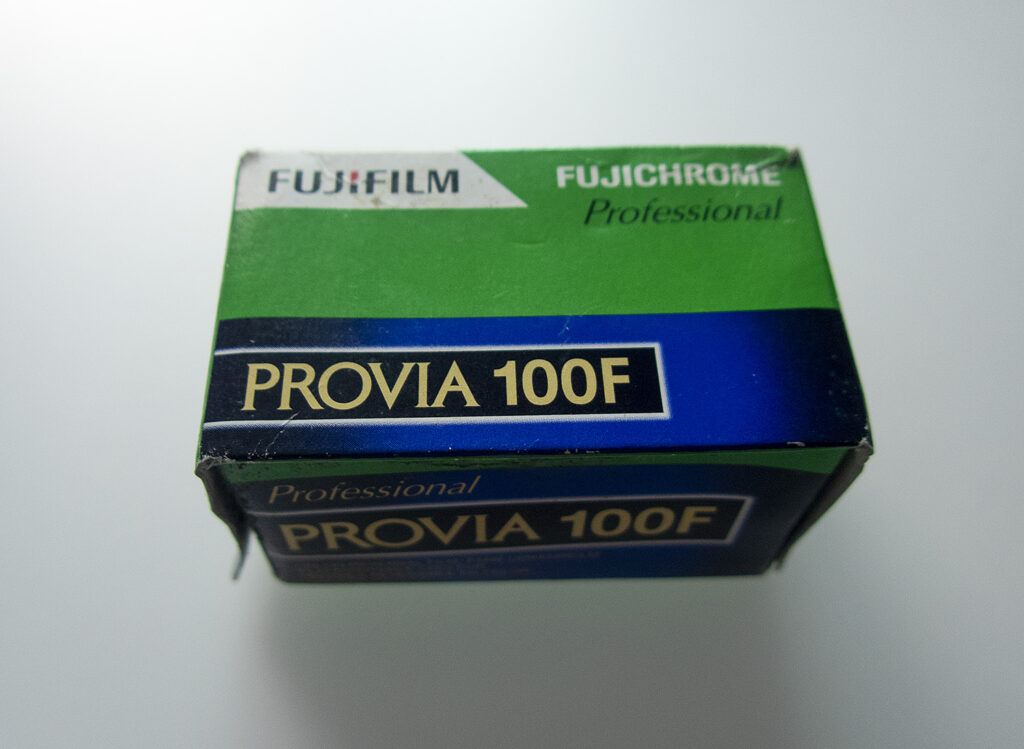
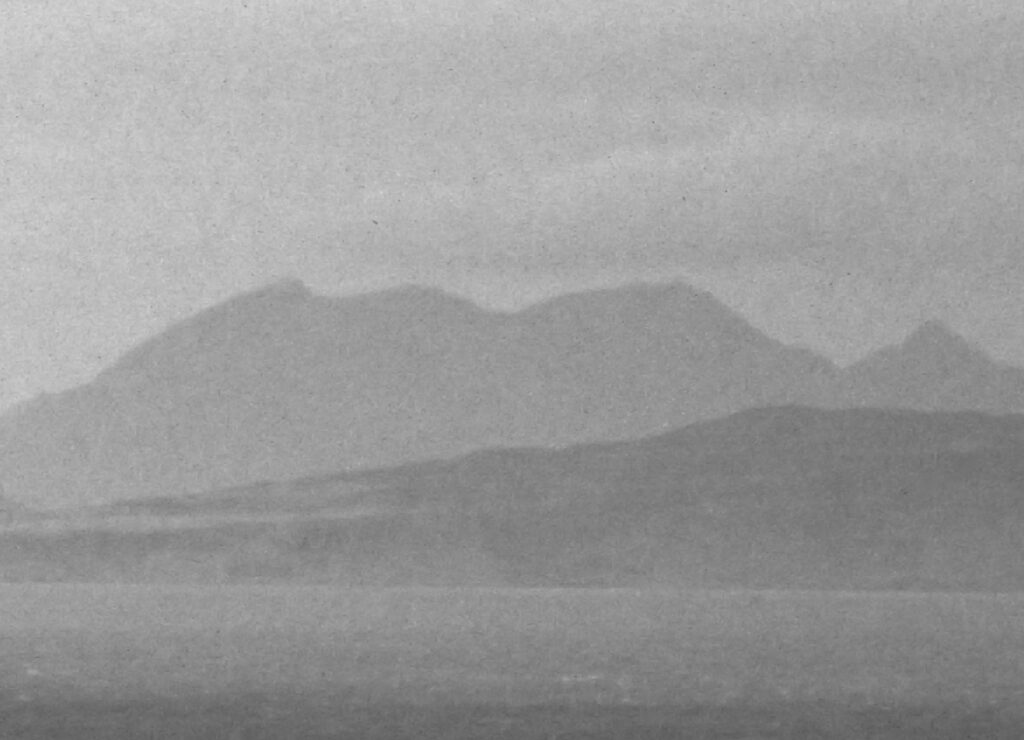
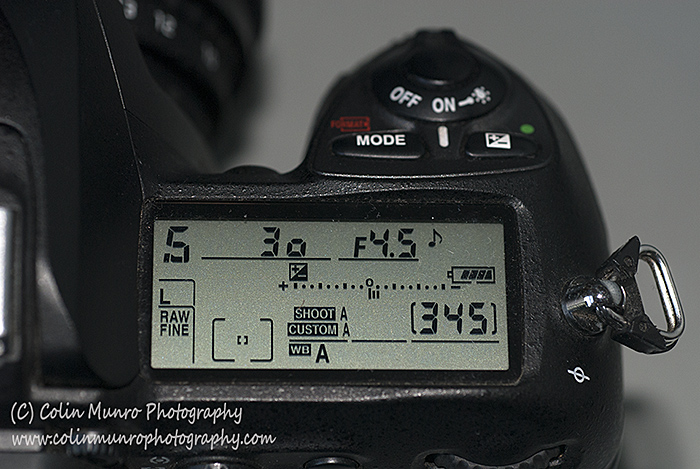
Film has light-reactive silver halide grains embedded in one or more layers of gelatin. Fast film has larger grains, slow film has smaller. As photons of light hit each grain it changes state, producing what is known as a latent image, across the film frame. But, and this is the crucial part, it takes roughly the same number of photons to change the state on a larger grain as it does on a smaller one. As the larger grains present more surface area, and there are fewer of them packed across the film frame, so fewer photons of light need to hit the exposed frame of larger grained film than fine grained film to produce the same exposure level. The downside of this was that fast film produced a ‘grainy’ look in the final image. This could look pretty cool in black and white photographs, not so much in colour (at least that’s my personal opinion). Now the thing about ISO in the days of film, it was fixed – more or less. By that I mean you bought a roll of film of a set ISO value, determined by the average size of the silver halide grains embedded in the film. So that could be Kodak 64, or maybe Fiju Velvia 100, both slow, fine grained films of set ISO values 64 and 100 respectively. And once loaded into your camera that was it. You set the ISO on the camera (normally a calibrated wheel on the top of the camera body) to the ISO value of the film, and exposed each shot based on that value. Well almost set. You could, if really necessary, ‘push’ the film. That is you could expose the film as if the ISO was one or two stops faster, then adjust the film processing times (extending the times in chemical baths) to account for this. I say ‘if really necessary’ because it did tend to shift the colours and contrast somewhat.

ISO speed in Digital Cameras

Okay, so that’s how ISO works in film cameras, but there is no film in digital cameras, and no silver halide grains, so what happens there? In digital cameras things work rather differently. The amount light hitting the sensor (as opposed to the film frame) is still governed by by the size of the aperture and the duration the shutter is open. However, the sensor itself does not become more or less sensitive to light as the ISO changes. Instead the process is one of changing the output voltage or charge on amplifier circuits, rather like changing the volume on an audio amplifier.

Although ISO speed changes are achieved in fundamentally different ways in film cameras and digital cameras the effect on exposure is almost the same. For example, changing the ISO from 100 to 200 changes the exposure, for the same amount of light reaching the film or sensor, by the same amount in either system. So changing from 100 to 200, or 200 to 400, changes the exposure by one full stop (i.e. the equivalent of doubling of the amount of light lighting the sensor or film). There is of course one crucial difference. As explained earlier, in film the ISO is set, it is a physical feature of the composition of the film. You want to change the ISO you need to load new film, which of course means using all the film currently in the camera first. But with digital cameras the ISO can be varied simply by pressing a button or turning a dial.

Film grain
Even though this was slow film (Fuji ISO 100) grain can still be seen in the detail of this older film image I took several decades ago of the Small Isles from the Ardnamurchan peninsula, Scottish Highlands.

High ISO. Image grain and image noise

There is another difference also nowadays. With film, slow, fine detailed, ISO is between 50 and about 200. Fast, grainy ISO is between 800 and 3200, 3200 being pretty specialist film. In the early days of widely available digital cameras (early 2000s) ISO 800 was considered pretty fast for digital cameras also. With the Nikon D200, for example (introduced in 2005) the ISO could be ramped up all the way to 1600. But it came at a price. Where analogue film produced grainy images from high ISO film, digital cameras produced ‘noisy’ images at high ISOs. What exactly are ‘noisy’ images? Noise in images is similar to the distortion in an audio system when the amplifier is turned up too high. How this amplification is achieved in in digital cameras depends on the type of sensor used (CCD or CMOS) and on the manufacturer and model.

Noise in digital image
Noise in a modern digital image. This is a crop of an image blown up to 200%. The image was taken at ISO 4000 to illustrate noise.

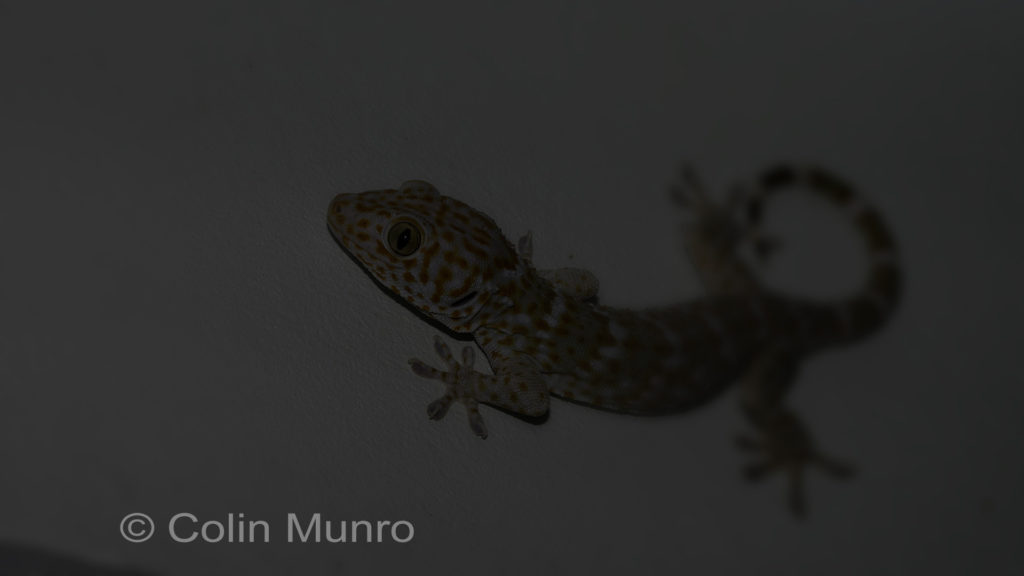
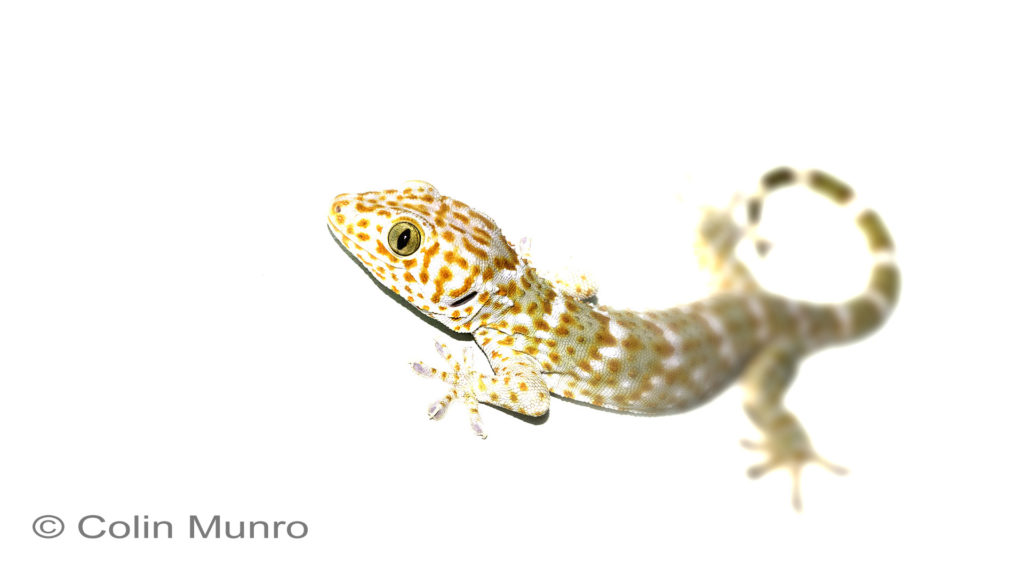
But fundamentally the light hitting the sensor is converted in to a voltage or charge. This voltage of charge is then amplified. At this stage it is still analogue, so any unwanted artifacts present are also amplified. This can manifest itself as random flecks of colour or brightness in the final image. For this reason the rule used to be to take a photograph at the lowest practical ISO in order to have as little noise as possible in the final image. However, the processing of images within digital cameras has advanced so much in recent years that (at the time of writing) ISOs of 6400 or even 12800 are possible with only minimal amounts of noise in the final image. This allows sharp, detailed images of fast moving objects to be taken in low light conditions that would not have been possible only a few years ago. In point of fact, I would argue that improvements in high ISO image quality have been the more meaningful developments in digital cameras over that past 15 years. I still own a very old DSLR from around 2006 (a Nikon D200 as it happens). It is an excellent camera that still serves my purposes perfectly well – most of the time. The one area it falls down on is in low light conditions where I need to use high ISO.

Fine Art Landscape and Wildlife Prints

If you enjoyed this story why not check out my other blogs. I write about travel, the environment, marine biology, diving and wildlife. You may also want to check out my photographic prints. These can be viewed on my main site www.colinmunrophotography.com and include landscapes from around the World, people of the World, marine life and other wildlife. The prints are only available through my website, each one individually processed and made to order. This includes fine art giclee prints, limited edition prints and canvas wraps. I use only the best, carefully selected print houses employing the finest papers and printing processes to ensure image fidelity and longevity.

fine art wildlife and landscape prints for sale. Colin Munro Photography www.colinmunrophotography.com
A sample of my fine art prints for sale

Photography Fundamentals. A beginners guide to photography: Image Exposure, Shutter Speed and Aperture.

A beginners guide to photography, looking at the key elements of a camera; how the relationship between shutter speed and aperture size determine exposure, and the relationship between stops and exposure value (EV).

For pretty much any photographic image, there are two features it must have. Firstly it must be in focus, at least somewhere in the image, and secondly, it must be correctly exposed.  Okay, okay, I know there are lots of ‘arty’ images out there that don’t conform to either, but for most of us in the real world, those are the rules.  I’m going to leave focus aside for the moment and concentrate on exposure: what we mean by this, how we achieve it, how we control it and modify it.  Now of course, if you leave your camera on auto, it will do a pretty decent job for you.  But that’s not very satisfying, and it’s not very creative.  It’s a bit like buying a painting; it may look great on you wall but it doesn’t make you feel like a painter.  So if we want to be photographers, not just a ‘guy (or girl) with a camera’ pressing the shutter button, then we need to have some understanding of what is actually going on inside the camera in order to take the ‘autopilot’ off, and take control ourselves.  The second consideration is, if you want to produce a standard image with textbook ‘correct’ exposure then leave it on auto and your camera will do that for you, at least most of the time. However, if you want to create something more interesting, more individual, then you need more control over how the camera captures the image, and that requires you to take the wheel yourself.

One of the biggest problems nowadays, for people new to photography, is that cameras are so damn sophisticated.  There are so many controls, settings, menus and sub-menus that it can feel like learning to drive in a fighter jet.  Just where do you start to take control?  in order to help understanding, let’s pare back our camera to its simplest form.  Every camera, whether it is the latest top-of-the-range, full-frame, mirrorless, or an 1839 Daguerreotype, is fundamentally a light-tight box with a hole (the aperture) on one side to allow some light in, and some light sensitive material on the opposite side, and a means of blocking the from light reaching the light sensitive material (the shutter) .

A beginners guide to photography, Photography Fundamentals.  Camera diagram showing aperture, sensor and light path. Colin Munro Photography
A camera is basically a light-tight box with an aperture at one end and light sensitive material at the other.

The light-path between the aperture and the light sensitive material is periodically unblocked (the shutter opened) allowing light to reach reach the light sensitive material. This material is then altered in some way by the light, and this begins the process of creating an image. What exactly that material is, has changed many times.  The 19th century Daguerreotype used copper plate coated with silver; early 20th century cameras mostly used glass plates coated with silver salts; then of course film took over; and now we have solid-state sensors that convert light in to electrical signals, but the the basic design is exactly the same.

So we talk about ‘exposing’ the plate, or film, or sensor, to light in order to create an image.  I’ll stick with sensors from this point, as that is what we use now. The amount of light hitting the sensor determines the lightness of the image.  The more light hitting the sensor, the lighter the images, the less light, the darker the image.  We talk about images being correctly, under- or overexposed.  By underexposed we mean that the mid-tones are too dark and we start to lose detail in the shadows. I’ve taken an image of mine of a tokay gecko and changed the exposure of it to illustrate this.

Beginners guide to photography. Photography Fundamentals. An example of an under-exposed image. Colin Munro Photography
Underexposed image of a tokay gecko on a wall

By overexposed the mid-tones are too bright and we start to lose detail in the highlights.

Beginners guide to pphotography. Photography fundamentals. An example of an over-exposed image. Colin Munro Photography
Overexposed image of a tokay gecko on wall

So we control the degree of exposure primarily by controlling the amount of light hitting the sensor, and we do this in two ways.  We can vary the length of time that the sensor is exposed to light (i.e. the duration the shutter is open) and we can vary the size of the aperture allowing light to reach the sensor.  So let’s look at those mechanisms in turn.

Shutter speed

The shutter is a pair of metal curtains, located in front of the sensor.  They act to block light passing through the aperture from reaching the sensor, except for the period the shutter is opened.  This is the same mechanism used in film cameras. However, today most mirrorless cameras, and some DSLRs, have an electronic shutter, where the sensor is switched on and off to produce a similar effect.

The duration the shutter is open is known as the shutter speed.  There are a range standard shutter speeds we see on most modern cameras, e.g. 1 second, 1/2 second, 1/4 second, 1/8 second, 1/15 second, 1/30 second, 1/60 second, 125 second, 1/250 second, and so on.  You will notice that each is (with minor exceptions) half the duration of the previous one.  Half a second allows in half as much light as a one second shutter speed; 1/125 allows in twice as much light as 1/250 of second. So changing from one ‘standard’ shutter speed to the next nearest either halves or doubles the amount of light hitting the sensor, depending on the direction of change.  Having or doubling the amount of light reaching the sensor is known as changing it by one stop.  Understanding the concept of stops (and exposure equivalent values, which I will explain further on) is fundamental to photography.

Aperture size

We also have a second means of regulating the amount of light reaching the sensor; we can change this by changing the size of the aperture. If we make the aperture twice as large, then twice as much light will hit the sensor (if the shutter is open for the same duration) if we make it half as large it will allow half as much light to reach the sensor.  This is preety self evident, I’m sure.  And this modifying the aperture by halving or doubling is known as changing it by …. one stop. Whilst the shutter speed values are pretty intuitive, aperture values are not.  They are known as f stops, and commonly values range between f2.8 and f22 (sometimes f1.4 – f32).  These f stops also change in standard increments, but at first glance they are quite meaningless: f2.8, f4, f5.6, f8, f11, f16, f22.  Even more puzzling, the largest number denotes the smallest aperture.  The simplified answer for this is that the f value is not a physical measure of the diameter of the aperture, it is a ratio between the focal length of the lens and the aperture: f value = focal length/aperture diameter.  From a practical stance, none of this theory matters to the photographer.  What does matter is knowing that each f stop allows in half or twice as much light the next full stop to the left or right, and that the smaller the number, the greater the aperture diameter, the greater the amount of light reaching the sensor.  Most modern cameras work on a click-stop principle.

A modern lens showing the aperture wide open
A lens showing the aperture stopped down to smallest size

So that the size of the aperture, rather than smoothly variable from smallest to largest, changes in a series of steps.  So when we change aperture on our camera, either by rotating a ring on the lens or, more commonly nowadays, a dial on the camera body, we feel a series or positive clicks.  These steps correspond to the f stop values listed above, plus (on modern cameras) 1/3 of a stop intervals.  So, for example, on our camera we might find f values of F2.8, f3.2, f3.5, F4, f4.5, f5, f5.6. The figures in bold are full stops, the figures in lighter text are 1/3 and 2/3s of a stop up or down.  The beautiful symmetry of the stop system is this.  Say for example, our image is correctly exposed at a combination of shutter speed 1/250th and aperture size f8.  If nothing else changes, then we know that if we change the aperture to f11 (one stop smaller) then the image will be underexposed by one stop. Equally, if we change the shutter speed to 1/500th, the image will be underexposed by one stop.  If we change the shutter speed to 1/500, and simultaneously change the aperture to f5.6, then the exposure stays exactly the same, because the former acts to half the amount of light reaching the sensor, and the latter acts to double the amount of light, thus the combined effect is that the total amount of light reaching the sensor is exactly the same.  The obvious questions are: why have two separate mechanisms to achieve the same control over the amount of light, and why would one alter two controls in order to produce exactly the same exposure.  There are several considerations here, and to detail them all would distract from the main purpose of this blog, so I’ll most of those for a future blog.  However, a key consideration is motion blur. If we have an aperture of fixed size, we can still achieve correct exposure by changing the shutter duration; this is in fact, exactly how a pinhole camera works.  The problem comes with photographing moving objects. The faster a subject is moving, the faster the shutter speed needs to be in order to freeze the motion and stop the subject appearing blurred.  This explains how, in some pinhole camera photographs, streets can appear empty of people or vehicles. because the aperture is so tiny, the shutter speeds often need to be very long (many seconds).  Fast moving objects move across the aperture too fast to register on the image. But even modern DSLRs, if we set the shutter speed too slow, then a fast moving object (e.g. a bird in flight or a sports player) becomes blurred in the image produced.

Exposure Values

The final concept I want to talk about here is Exposure Value (EV or sometimes Ev). As explained above, different combinations of shutter speeds and aperture sizes will still produce the same image exposure. Exposure values assign one value to all the combinations that produce the same exposure.  In practical terms, exposure values are mostly interchangeable with stops.  Underexposing an image by one EV is the same as underexposing by one stop.  We tend to refer to stops when taking about shutter speed of aperture.  When we want to vary exposure in automatic or semi-automatic modes (not something I’m covering here) then we start to refer to EV and vary it using the Exposure Compensation button; but that’s all for another blog.

What I’ve missed out

In order to keep things fairly simple, I haven’t talked at all about the third factor in what is often called the exposure triangle, namely ISO.  That will be the subject of another blog soon.

Photography workshops, online classes, one-to-one tuition

This blog is an excerpt from my beginners photography teaching. You can learn more about my photography lessons, online and one-to-one tuition and photography workshops at my main website www.colinmunrophotography.com. During the current restrictions due to covid-19, I am mostly running online one to one teaching. The good news is that these can be accessed anywhere in the World. You can find out more about them here.

Photography in the digital age: what’s changed?

An old lady weaving pandanus leaves laughs as she works. Suau Island, Milne Bay Province, Papua New Guinea. Colin Munro Photography © Colin Munro

The shift from film cameras to digital has produced enormous technological and social change. How has this affected teaching photography skills

A school of Convict Surgeonfish graze a reef promontory, Nuie Island, South Pacific. © Colin Munro Colin Munro Photography
A school of Convict Surgeonfish graze a reef promontory, Nuie Island, South Pacific. Photographing light coloured fish against blue water is one of many situations where you don’t want to use auto settings. Image taken with a Nikon D610 and Nikon 20mm in an Aquatica housing, while free-diving around Nuie Island, October, 2019.

(Note this is an updated version of a blog I initially published in 2020)

When I was young, both the World and photography was much simpler. The changes that have occurred in the World would take more than a blog to describe, so I’ll stick to those that directly affect photography. Back in the 1980s photography was film, and cameras were electro-mechanical machines – and so fairly simple to understand how they worked.  In fact, I started out in underwater photography before ever seriously using a camera on land, and the camera I started with (a second-hand, mid-1970s vintage Nikonos III) was entirely mechanical, to all intents and purposes a slightly tweaked version of the Calypso-phot designed by the Belgian engineer Jean de Wouters for Jacques Cousteau’s La Spirotechnique  company.  

Nikonos III camera

Nikonos III mechanical camera with the standard 35mm Nikonos lens. Image Nikon Museum.

Incredibly simple by modern standards, my Nikonos III had the great advantage that if the camera flooded during a dive, one simply took it apart – a very easy process – washed it with fresh water, left it to dry, and put it back together.  Good luck doing that with any modern camera!  A second advantage of my mechanical Nikonos was that taking pictures underwater wasn’t that easy, especially so in the dark, turbid waters of the Firth of Clyde where I was based at that time. That may be counter-intuitive, but if you actually wanted to make money from taking photographs, then you definitely did not want it to be something that could be done with little or no skill or training.  There was no light meter, so you had to base settings on experience.  Flash lighting ( a necessity in such waters) was manual only, so you needed to know the power of the flash, estimate the total light path distance and set your camera aperture accordingly.  Add to this that a film roll contained only 36 frames, and of course film could not be changed underwater.  Once the 36 frames were used up, that was it. Dive over.  

A large female tiger shark, Galeocerdo cuvier, inspects the photographer as she cruises past.  'Scarface' as she is knwon, is between 4 and 5 metres (13 to 16 feet) in length.  The photograph was taken at about 30 metres depth, on a reef ledge off Beqa Lagoon, Fiji.  Unlike the open coast around Fiji the waters of Beqa Lagoon are often relatively turbid due following heavy rainfall.  Photograph by Colin Munro. Copyright Colin Munro Photography.
One of my later underwater film images (taken in 2008, on a Nikon F4 camera in an Aquatica housing). This tiger shark was shot without flash at around 30 metres depth in quite turbid waters off the coast of Fiji. The low light levels were pushing the limits of my 100 ISO film stock, and the low light levels and turbidity of the water made focusing a challenging operation.

The end result of this was that there were far fewer underwater images around in the early 1980s, and a pretty low percentage of these were actually useable.  Nowadays there are estimated to be around 6 Million active SCUBA divers Worldwide (Diving Equipment and Marketing Association, 2019) and a fair percentage of those are taking underwater photographs.

Many of the changes in underwater photography over the past few decades have been replicated on land. Cameras have changed from being (relatively) simple devices for creating images on film, to hugely sophisticated instruments that convert light to electrical charge and so create and store digital images.  A modern digital SLR will produce images that are sharper and contain far more detail than the best 35mm film images of just a few years ago. They are also created at a far greater rate.    A total of somewhere around 25 thousand million photographs were taken in 1980, a vast number that is true, but compare that with 2017. Around 1.2 Trillion photographs were uploaded in 2017.  Gizmodo estimates that 300 million photographs were uploaded on to Facebook alone in 2019.  This creates two immediate problems for any serious photographer. Firstly, almost all of the millions upon millions of images that are online can be viewed freely, so why should someone pay for your images?  Secondly, even if they want to pay for your images, how on earth do you get people to find them within this staggeringly vast array of pictures?  These are the key problems facing pretty much all photographers trying to sell images nowadays.

The problems do not end there. Most images are licensed through stock agencies to print companies, newspapers or magazines (e.g. a licence is granted to use the image for a limited period of time or set publication or print run).  Back in the 1980s this could generate a serious income.  But now, not only are there many, many more images to choose from, but the newspapers and magazines no longer make the same profit from advertising as they too have lost out to the online world.  Almost all newspapers nowadays lose money, so they are looking for the cheapest images possible much of the time.  It is not possible to come out with a scientifically robust figure, but from personal experience and talking to lots of friends and colleagues, I estimate that – for similar levels of effort – the income generated from stock image sales is between a 1/10th to 1/20th of 1980s levels.   That does not mean you cannot make money selling images through stock agencies (or directly) but it does mean you will need to work hard at it and are unlikely to make your fortune doing so.  It is also a downwards spiral; each years tens of million more images are created, and the value of individual images correspondingly falls. This is without touching on the issue of AI generated images, which may prove the final nail in the coffin of stock photography.

A black and white edit of beach and skyline, One-foot-Island, Aitutaki, Cook Islands, Polynesia. Monochrome for landscape is very much a personal preference. Generally it works better with high contrast images.  Nikon D610, Nikon 20mm, polarising filter. Aitutaki, October 2019.

One of the great things about modern DSLRs and mirrorless digital cameras is that they are incredibly powerful image-creating machines, with a huge array of setting controls, functions, custom-settings, menus and sub-menus that allow the photographer enormous control over the appearance of the final image.  But one of the terrible things about modern DSLRs and mirrorless is that they are incredibly powerful image-creating machines, with a huge array of settings and controls ……  so you get the idea.  Picking up a modern DSLR or mirrorless for the first time can be a very daunting experience.  Our cameras have never been better equipped to capture images that are incredibly faithful to real life or to create stunning artistic images, and yet the overwhelming majority of these cameras are rarely used in anything other other than auto mode.  Fortunately, many people are sufficiently motivated to get to grips with more of the full potential of the high tech piece of very expensive hardware they have paid good money for.  As a consequence many professionals, myself included at times, have made the shift across from solely taking photographs to teaching photography.

An old lady weaving pandanus leaves laughs as she works. Suau Island, Milne Bay Province, Papua New Guinea. Colin Munro Photography © Colin Munro
An old lady weaving pandanus leaves laughs as she works. Suau Island, Milne Bay Province, Papua New Guinea. I prefer longer lenses for people shots.  It makes obtaining a shallow depth of field so much easier, but just as important, it provides some distance, so the subject is more likely to be behaving naturally rather than posing for the camera. Nikon D610 and Nikon 80-400mm 4.5-5.6D lens.

Teaching photography can be a rewarding process.  For one thing there is nothing like teaching any subject to test whether you really understand it yourself. Secondly, this is far from a static field.  The techniques I teach now have changed radically from those I taught  ten years ago, because cameras themselves have changed radically in that time.    Photography is a constant learning and re-learning process.  When digital photography began to supplant film based photography I deeply resented it.  Digital was precise, more automated; but photochemical changes in silver halide crystals embedded in film emulsion were not precise.  They changed in a manner that could not be fully predicted. Film was ….. well, magic.   But the more I learned as a (initially) reluctant convert to digital, the more I appreciated that many of the skills I had learned in the previous 25 years were not redundant but actually quite transferrable and highly useful still in the digital era.  More than that, the limitations of my early mechanical cameras and the photographically challenging environment of the dark and turbid waters of Southwest Scotland meant that I was forced to really learn the basic principles of photography and how light behaved in different situations.  Photography is still, at its core, painting with light, and these basic principles still underpin photography using today’s latest digital camera systems.

An Australian Flatback Turtle, Natator depressus, hauls itself up a deserted beach, Adele Island, Kimberley Coast, Northern Australia. © Colin Munro www.colinmunrophotography.com

An Australian Flatback Turtle, Natator depressus, hauls itself up a deserted beach, Adele Island, Kimberley Coast, Northern Australia. A wide-open lens helps isolate the subject from the background. A long lens allows nice tight shots without encroaching close on the subject and possibly disturbing her.  The arrival of a fallback on the beach was completely unexpected, but her slow progress across the sand to above the high water mark where her eggs would be laid allowed plenty of time for multiple shots to be taken.  I like this one because of the eye contact.  Nikon D610, Nikon 80-400 4-5.6D lens.

Despite all the advances, photography still remains the manipulation of light in order to obtain a (mostly) sharp and correctly exposed image on light sensitive media. The control we have in order to achieve that has expanded almost out of all recognition, but the fundamental variables: shutter duration, aperture size, media sensitivity to light, lens properties and sensor dimensions are still fundamentally unchanged since the days of George Eastman’s Box Brownie developed 120 years ago.

Other blogs of mine

 You may also enjoy: Laos Stories

Don’t forget to SUBSCRIBE to my blog and newsletter (in the sidebar). It’s free and you can unsubscribe at any time.

For more on wildlife, landscape and underwater photography, art prints and photography tuition, check out my main website:

Colin Munro Photography website.
colinmunrophotography.com

Shutter speed control on digital cameras, what exactly does it do?

The LCD Display on a Digital SLR camera showing the shutter speed (here set to 1/30th of a second). This diplay may be on the top or back of the camera, depending on model. Colin Munro Photography

About a week ago I put up an article looking at looking at what the ISO control on a camera does, so it seems logical to cover the other camera controls that determine image exposure. So logically the place to start is with the first, most basic control, the shutter.  The shutter is basically light-proof barrier placed between the camera’s sensor (or film frame, if you’re old school) and the aperture through which light passes in to the camera.  But, and this is the key aspect, it is a barrier that can be opened for precise durations of time.  Now image exposure is determined by the amount of light hitting the sensor: too much light and the image is overexposed, too little and the image is underexposed, the correct amount and the image is just right (think of Goldilocks and the three bears).  So one way we can control the amount of light hitting the camera’s sensor is by controlling how long the shutter is open and light is allowed to pass through and reach the sensor, rather like controlling the flow of water in to a glass with a tap.

So what does a shutter look like?  various designs have been used over the years with different camera types and as cameras have evolved.  Digital SLR cameras (and film SLRs for that matter) use what is known as a focal plane shutter, that is a shutter placed directly in front of the flat area where the camera sensor (or film) is located.  These consist of a series of overlapping blades that lift and fall as the shutter opens and closes.  Compact, point and shoot, cameras generally do not have a mechanical shutter (as the focal plane shutter is) rather they have an electronic shutter.  Electronic shutters are an integral part of the camera sensor and primarily work by ‘turning off’  reading of the light hitting the sensor.

Focal plane shutter in a film SLR, showing mechanism.  Shutter CLOSED

Focal plane shutter in a film SLR, showing mechanism. Shutter CLOSED

Focal Plane shutter mechanism in a film SLR. Shutter OPEN.

Focal Plane shutter mechanism in a film SLR. Shutter OPEN.

Shutter speed. When we talk about shutter speed that we are actually referring to is the duration the shutter is open and the sensor exposed to light.  In most general photography these durations are only fractions of a second and, despite the spread of decimalisation, we still tend to use common fraction rather than decimal fraction notation (e.g. 1/2, 1/4, 1/8, 1/15th of a second).   Setting the shutter speed on a camera serves two purposes: firstly it determines how much light hits the sensor, and secondly it freezes or blurs movement across the image.

Shutter speed control on a film SLR, showing standard shutter duration increments. Colin Munro Photography

Shutter speed control on a film SLR, showing standard shutter duration increments.

The LCD Display on a Digital SLR camera showing the shutter speed (here set to 1/30th of a second).  This diplay may be on the top or back of the camera, depending on model. Colin Munro Photography

The LCD Display on a Digital SLR camera showing the shutter speed (here set to 1/30th of a second). This diplay may be on the top or back of the camera, depending on model.

Motion blur. Not everything we photograph remains perfectly still. So, the duration the shutter is open will also influence how sharp a moving object is, or whether it is blurred due to it moving across the field of view whilst the shutter is open.  This can be a person, an animal, cars, flowing water etcetera.   Mostly we want our images nice and sharp, with objects frozen in time, but sometimes we will deliberately allow (our induce) motion blur for artistic reasons or to give the impression of movement.  A further consideration here is that motion blur comes not just from objects in front of the camera moving.  If we hand-hold a camera (as opposed to mounting on a tripod) there will always be a slight amount of ‘hand shake’.  At faster shutter speeds this is not noticeably in the captured image but with very slow shutter speeds the camera will wobble slightly in our hands whilst the shutter is open. This results in everything in the image being slightly burred.  A general rule of thumb is to shoot at 1/60th or faster when hand holding your camera, for non-moving objects when using a standard lens (i.e. not a telephoto lens).  When shooting using a telephoto lens, or shooting fast moving objects (maybe motor sports) you will need a significantly faster shutter speed to freeze motion, maybe 1/250th of a second or possibly up to 1/1000th of a second depending on factors such as the focal length of the lens, the speed the subject is moving at and how close you are to the moving subject.

Find me on Google+ Colin Munro

Like my page on Facebook
My main website Colin Munro Photography
Follow me on twitter @colinmunrophoto

ISO setting on digital cameras, what exactly does it do?

ISO setting on digital cameras, what exactly does it do?

This is part of an occasional series looking at the basic controls on a camera. It’s here primarily to supplement, and as a taster for, my beginners photography classes and one-to-one sessions. Some of the controls on a camera are fairly intuitive. Zoom, for example, controls the focal length of the lens and so the degree of magnification of the image (we zoom in, or we zoom out). Shutter speed controls the…er…speed of the shutter; well accurately it controls the duration the shutter is open, and so the amount of light allowed to pass through the shutter and impinge on the sensor, which in turn directly influences how bright or dark the image is. But ISO? Knowling that the acronym stands for International Organisation for Standardation doesn’t help that much either, and yes, I know it should be IOS not ISO (there are reasons but truthfully that would simply be too much of a digression to go there now, ask me after class :)). So if we simply accept that the name, ISO, tells us nothing about what the control actually does – then what does the ISO control on a camera do? Essentially the ISO setting works rather like the amplifier on a radio or CD player; it varies the signal gain to produce a brighter (for higher iSO values) or darker (for lower ISO values) without any changes in the amount of light hitting the sensor. Typically ISO values range from 100 (low) to 3,200 or 6,400 (high) on some cameras. These numbers are derived from film; with film cameras the film had a set sensitivity to light. Film that responeded quickly was termed fast film; film that responded slowly …. you’ve guessed already ..slow film. The film’s sensitivity could not be changed, so once it was loaded into the camera the ISO value of that film was then dialled in using the camera ISO control, allowing the film’s sensitivity to be taken in to account when exposure was evaluated by the camera’s light meter (or it would be dialled in to the meter if a hand held light meter was used). The ISO sensitivity in a digital camera is created very differently to in a film camera, but the same numerical values are used and they approximate closely to the changes in sensitivity to light that occurred in film. Essentially, the steps between each ‘standard’ ISO value represents a doubling or a halving in senstivity, depending on whether one goes up or down. So ISO 200 is twice as sensitive as ISO 100; ISO 400 is twice as senstive as ISO 200, and so on. What does this mean in practical terms? Well, if a particular scene was correctly exposed at a shutter speed of 15th of a second at ISO 100, then (all other settings remaining unchanged) the same scene would still be correctly exposed at 30th of a second at ISO 200 (a shorter time the sensor is exposed to light, but a more sensitive ISO value) it would also be correctly exposed at 60th of a second at ISO 400. Okay, so what would the correct ISO setting be if the shutter speed was changed to 500th of a second?
Hopefully this explains how the ISO values influence image exposure, but why do we want this control? Well there are a few situations where it is useful but the fundamental one is that a higher ISO allows us to use faster shutter speeds. If we go back to my first example, a shutter speed of 15th of a second at ISO 100. A 15th of a second is very slow and likely to produce a blurred image, a) due to the slight shakiness in everyone’s hands and b) as people (or animals, cars etc.) move. By selecting a higher ISO value we can then change to a faster shutter speed where these problems will be greatly reduced (for the sake of simplicity I have not considered aperture values and have assumed they remain unchanged).


Find me on Google+ Colin Munro
Like my page on Facebook
My main website Colin Munro Photography
Follow me on twitter @colinmunrophoto