About a week ago I put up an article looking at looking at what the ISO control on a camera does, so it seems logical to cover the other camera controls that determine image exposure. So logically the place to start is with the first, most basic control, the shutter. The shutter is basically light-proof barrier placed between the camera’s sensor (or film frame, if you’re old school) and the aperture through which light passes in to the camera. But, and this is the key aspect, it is a barrier that can be opened for precise durations of time. Now image exposure is determined by the amount of light hitting the sensor: too much light and the image is overexposed, too little and the image is underexposed, the correct amount and the image is just right (think of Goldilocks and the three bears). So one way we can control the amount of light hitting the camera’s sensor is by controlling how long the shutter is open and light is allowed to pass through and reach the sensor, rather like controlling the flow of water in to a glass with a tap.
So what does a shutter look like? various designs have been used over the years with different camera types and as cameras have evolved. Digital SLR cameras (and film SLRs for that matter) use what is known as a focal plane shutter, that is a shutter placed directly in front of the flat area where the camera sensor (or film) is located. These consist of a series of overlapping blades that lift and fall as the shutter opens and closes. Compact, point and shoot, cameras generally do not have a mechanical shutter (as the focal plane shutter is) rather they have an electronic shutter. Electronic shutters are an integral part of the camera sensor and primarily work by ‘turning off’ reading of the light hitting the sensor.

Focal plane shutter in a film SLR, showing mechanism. Shutter CLOSED
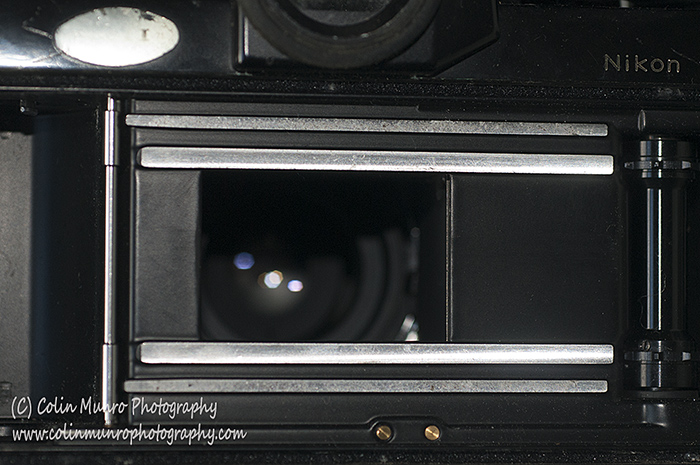
Focal Plane shutter mechanism in a film SLR. Shutter OPEN.
Shutter speed. When we talk about shutter speed that we are actually referring to is the duration the shutter is open and the sensor exposed to light. In most general photography these durations are only fractions of a second and, despite the spread of decimalisation, we still tend to use common fraction rather than decimal fraction notation (e.g. 1/2, 1/4, 1/8, 1/15th of a second). Setting the shutter speed on a camera serves two purposes: firstly it determines how much light hits the sensor, and secondly it freezes or blurs movement across the image.

Shutter speed control on a film SLR, showing standard shutter duration increments.
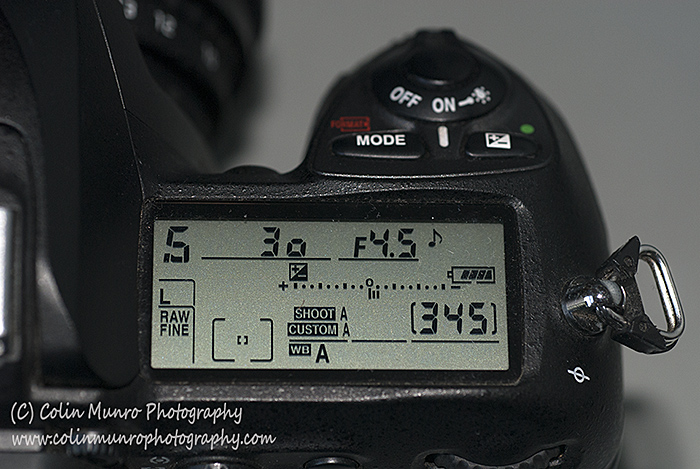
The LCD Display on a Digital SLR camera showing the shutter speed (here set to 1/30th of a second). This diplay may be on the top or back of the camera, depending on model.
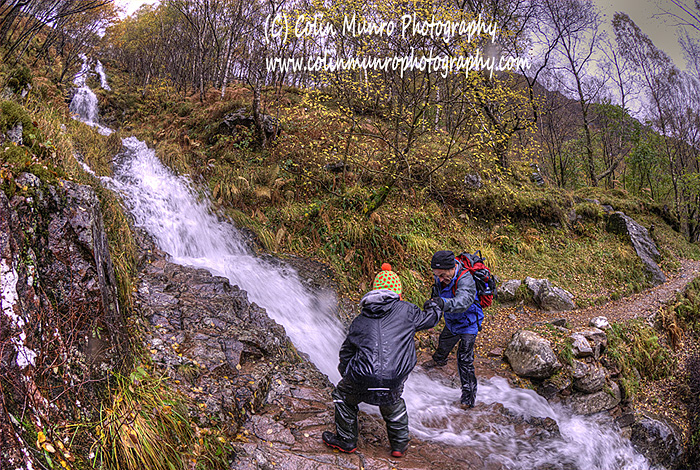
Motion blur. Not everything we photograph remains perfectly still. So, the duration the shutter is open will also influence how sharp a moving object is, or whether it is blurred due to it moving across the field of view whilst the shutter is open. This can be a person, an animal, cars, flowing water etcetera. Mostly we want our images nice and sharp, with objects frozen in time, but sometimes we will deliberately allow (our induce) motion blur for artistic reasons or to give the impression of movement. A further consideration here is that motion blur comes not just from objects in front of the camera moving. If we hand-hold a camera (as opposed to mounting on a tripod) there will always be a slight amount of ‘hand shake’. At faster shutter speeds this is not noticeably in the captured image but with very slow shutter speeds the camera will wobble slightly in our hands whilst the shutter is open. This results in everything in the image being slightly burred. A general rule of thumb is to shoot at 1/60th or faster when hand holding your camera, for non-moving objects when using a standard lens (i.e. not a telephoto lens). When shooting using a telephoto lens, or shooting fast moving objects (maybe motor sports) you will need a significantly faster shutter speed to freeze motion, maybe 1/250th of a second or possibly up to 1/1000th of a second depending on factors such as the focal length of the lens, the speed the subject is moving at and how close you are to the moving subject.
Find me on Google+ Colin Munro
Like my page on Facebook
My main website Colin Munro Photography
Follow me on twitter @colinmunrophoto